 |
|
|
♥ Table of Contents ♥ JDR Brazilian Embroidery Designs ♥Hearts and Flowers Designs ♥Quilt Sampler Designs ♥Brazilian Embroidery Learning Kits ♥Starter Package ♥Sunshine's Treasures ♥ Brazilian Embroidery Guest Designers ♥Delma Moore-Blackberry Lane ♥Candle In The Cellar ♥Karen Buell ♥Maria Freitas EdMar ♥Mary Kurbis ♥Debbie Kelley ♥Brandi Mikla ♥Anna Grist ♥Christmas Designs ♥Quilt Blocks  ♥Threads and Ribbons ♥EdMar Threads ♥Thread Packets ♥YLI Silk Ribbon ♥Kreinik Metallic ♥Japan Threads ♥YLI Candlelight ♥Rajmahal Art Silk ♥Faceted Metallic Thread ♥Specialty - Metallic
♥Newest Notions
|
Where To
Knot
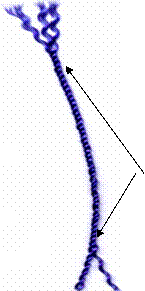
· The heavy thread, called Lola, has a right and a wrong end to sew with. This can be determined by gently untwisting the two ends of the thread. The end that unravels into three strands and looks like a brush is the end you sew with. The end you knot also unravels, but it splits into two rather than three. I know this may seem rather vague until you actually try it yourself.
·
After you’ve begun to sew, if
the heavy (Lola) thread twists a lot (some twisting generally occurs), let
the needle dangle. I call this
the “Dangle Dance” or try working
with the other end. This technique is mainly for the heavy thread, which is
3-ply.
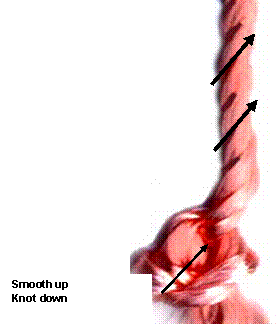
· Another way to differentiate is by feeling. Find a sensitive place between your thumb and index finger and slide down the 3-ply thread. If it feels “smooth”, you knot the bottom end. If it feels “rough”, you sew with the bottom end. You want the smooth direction of the thread to glide up through the fabric. · If the thread still seems to be kinking or getting knotted for you – NOW is the time to stop and do your finger exercises. Play the piano in the air and wave to the crowd. Sometimes it is the tension in your hands or you are “playing” with your thread that is causing the problem. Give your hands a gentle shake and try again.
Knotting the Thread Making the knot on the end of the thread.
Quilter’s’ knot: 1. Thread your needle and clip the thread so the end is not frayed or has a white spot. 2. Take your needle with your right hand and the tail end of the thread with your left. 3. Aim your needle’s point and your thread at each other.
5. With your right hand (the one that is holding the needle), pinch the tail of the thread down onto the shaft of the needle. 6. With your left hand, begin winding the thread onto the needle close to the holding fingers of your right hand. 7. Keep the coils close together. 8. Wind the thread three or four times.
9. More wraps will create a bigger knot. 10. Without fully releasing your grip on the thread, carefully nudge your pinched fingers onto the coiled thread. 11. Your left hand may need to stabilize the needle while you adjust your grip. 12. Your fingers will stay gripped on these coils until the knot is completed.
13. Pull the needle with your left hand while maintaining a good grip on
the future knot with your right hand.
15. A slight tug and you have a neat little knot formed at the end of your thread. Simplified Method: Hold eye of needle left hand, wind thread 2-3 times around point. Hold wound part tight with left hand and pull needle with your right hand thru to end of thread. You will have a nice knot.
After you have knotted the thread – “wet and twirl”. This means for you to
wet your finger tips and dampen the knot and the very end of the thread.
Give the end a slight tug (this will tighten the knot and lock it). Then
give the end a twirl with your fingers to unravel the end of the thread.
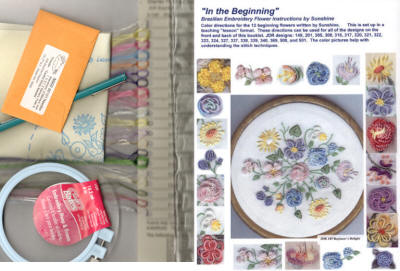 Brazilian Embroidery Starter Package |
 View Cart Sunshine's Newest Book
Sunshine's Fantasy
World
Information |

Striving to keep you Wrapped In Stitches!
|
||
Contact Us
Ordering Information
Shipping
Fees
Terms & Payments
Back Orders/Special Orders
Returns

 |
||


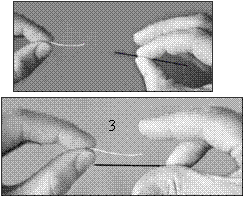
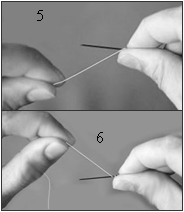 4. Bring
your hands closer together so that your needle’ point and thread end
overlap.
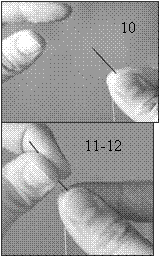
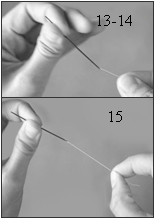 14. Pull
the needle until the entire length of thread has passed through the knot.
