 |
|
|
♥ Table of Contents ♥ JDR Brazilian Embroidery Designs ♥Hearts and Flowers Designs ♥Quilt Sampler Designs ♥Brazilian Embroidery Learning Kits ♥Starter Package ♥Sunshine's Treasures ♥ Brazilian Embroidery Guest Designers ♥Delma Moore-Blackberry Lane ♥Candle In The Cellar ♥Karen Buell ♥Maria Freitas EdMar ♥Mary Kurbis ♥Debbie Kelley ♥Brandi Mikla ♥Anna Grist ♥Christmas Designs ♥Quilt Blocks  ♥Threads and Ribbons ♥EdMar Threads ♥Thread Packets ♥YLI Silk Ribbon ♥Kreinik Metallic ♥Japan Threads ♥YLI Candlelight ♥Rajmahal Art Silk ♥Faceted Metallic Thread ♥Specialty - Metallic
♥Newest Notions
|
You MUST have the appropriate supplies to make this an
enjoyable stitching experience. Problems may arise with the use of improper
materials. Suggested supplies: Milliners Needles: Size 1,3,5,7; #18 or #16 Darner; (Sunshine's Suggestion: ♥N900 JDR-BE 101 Beginner Needle Assortment 2 each of size 1,3,5,7 milliner needles; 2 of #18 darner, one Black Beauty needle threader, one Needle puller, card with needle pictures for a guide, Thread vs. Needle Size Information. Great for the beginner!) The needle types and sizes are on the needles pages. 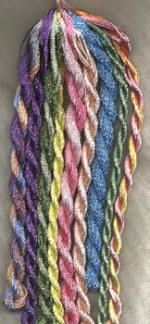 “Z” Twist Thread: You
will need a sampling of each weight – color scheme is not an issue unless
you want your doodle cloth to become a masterpiece. “Z” Twist Thread: You
will need a sampling of each weight – color scheme is not an issue unless
you want your doodle cloth to become a masterpiece. “Black
Beauty” needle threader “Black
Beauty” needle threader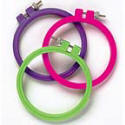 Embroidery Hoop:
Susan Bates 5” or smaller. Embroidery Hoop:
Susan Bates 5” or smaller.A good way to decide if the hoop is the right size is to grip the edge of the hoop like you would when you are stitching: if your fingers can easily reach the center the hoop is a good size for you. Spring hoops-I do not recommend for the beginner. Frustration created when stitching the squeezer bars into your stitching is not something that will happen with a Susan Bates hoop. You will find that the spring hoops do not hold the fabric taut enough to keep the fabric from puckering. A Thick Towel: This is to place under your work when stitching at the table. You will need to set your work down often to complete some of the stitches. This helps to keep the table from getting scratched. The towel also keeps those needles from rolling off the table.  Water Soluble Marker: Marvey Pen  Scissors:
Small-easy-to-handle and keep in your sewing kit. Scissors:
Small-easy-to-handle and keep in your sewing kit. I
recommend the thread cutter pendant if you are
going to be flying and want to take your stitching on to the plane. I
recommend the thread cutter pendant if you are
going to be flying and want to take your stitching on to the plane.Needle grabbers: The grabbers are used when the thread has been wrapped excessively tight around the needle and a grip is needed to pull the needle through. Some stitchers have gotten those “free give a ways” from their banks or real estate companies that are for opening your canning jars and then cut them into disks. A rubber balloon also works well. Magnifier: Good “cheater” reading glasses or a magnifier similar to the Mag-eyes. Light Source: Get a good light source that can give you lighting without a lot of shadows. Daylight is best. If you are right handed have your light source behind your left shoulder. Drizzle Pin Cushion: This is different than a tomato pincushion. The flat base keeps the pincushion form tipping over or rolling away while you are making drizzle stitches. 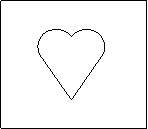 Doodle
Cloth: Trigger/Blazer Poplin – Cream or White 20" x 20" Doodle
Cloth: Trigger/Blazer Poplin – Cream or White 20" x 20" All stitcher should have a proper doodle cloth to practice new techniques and flowers. The doodle-cloth can “some day” become a work of art! I suggest that you begin by putting your initials, an oval, a heart or some favorite shape on your doodle cloth with a water-soluble marker. Do not use ink pens, graphite pencils or air erasable pens for marking your fabric. Leave at least 4 inches around the edge. Make the drawing big enough to accommodate at least 20 flowers – so take up almost all of the space with your drawing. The doodle creation is for fun and practice– don’t try to make it absolutely perfect! Use the doodle cloth to practice your stitches and flowers, placing the flowers along the drawn shape. The heart was pictured in the local newspaper - my first doodle cloth. Out of all of the designs that were hanging in the show room, this is the one they picked to photograph. The bullions were not neat and tidy and the cast-ons were uneven. There were some pretty strange looking flowers and leaves. But it really did turn out pretty. When I started, I wanted to know every flower there was and just couldn’t spend the time repeating one flower. I was on a passionate journey! Pictures of my first two doodle cloths are below. Yours will look just as great!
Buttons were added to the “S”.
If you would like what I call a starter package see below:
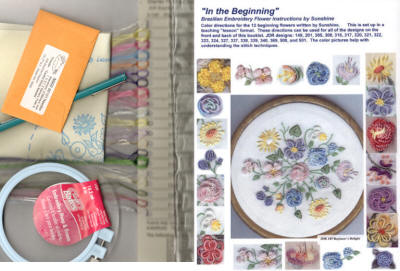 Brazilian Embroidery Starter Package |
 View Cart Sunshine's Newest Book
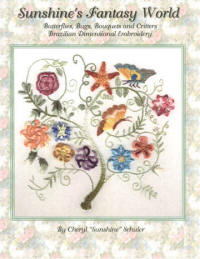
Sunshine's Fantasy
World
Information |
||||||||||||||||||||||||||||||

Striving to keep you Wrapped In Stitches!
|
||||||||||||||||||||||||||||||||
Contact Us
Ordering Information
Shipping
Fees
Terms & Payments
Back Orders/Special Orders
Returns

 |
||||||||||||||||||||||||||||||||

